How to Make Ghee
I learned how to make ghee years ago when I did my first Whole 30. Honestly, I don’t think I had ever heard of ghee until I started looking up Whole 30 compliant recipes and it kept showing up in the ingredients lists. Once I educated myself on what ghee was, I went on a mission to acquire some for my new paleo lifestyle. And do you know what I found? Not only was ghee difficult to find at that time, it was ridiculously expensive! So I did what I always do when something seems to be too expensive, I figured out how to make ghee myself at home. I’m going to share my process so you too can enjoy this nutty tasting, healthy fat without breaking the bank.
Here’s the scoop on ghee. Butter is essentially made up of 3 things: 1)butterfat, 2)water, and 3)milk proteins, also referred to as milk solids. When butter is heated, these three things begin to separate. If you heat the butter long enough to evaporate the water, you get clarified butter, but if you continue cooking it, you can separate out the milk solids, and what you are left with is ghee. The removal of the milk proteins means that ghee is very low in, if not devoid of, lactose and casein. Lactose and casein are the components of dairy products that are most likely to cause systemic inflammation. This is why ghee is a paleo, Whole 30 compliant healthy fat, and regular butter, even if it is grass-fed, is not.
Since the final result of the ghee making process is butterfat, just like other healthy cooking fats, you want to eat the highest quality possible. This means you want to start with grass-fed butter. Our favorite brand is Kerrygold, which is sold in most major grocery stores, but if you are lucky enough to have access to a local grass-fed dairy farm, source your butter from them! We typically use salted butter because Costco sells salted Kerrygold at an amazing price, but unsalted butter will work just as well.
Ok, enough with the background information. Here are my simple steps for how to make ghee.
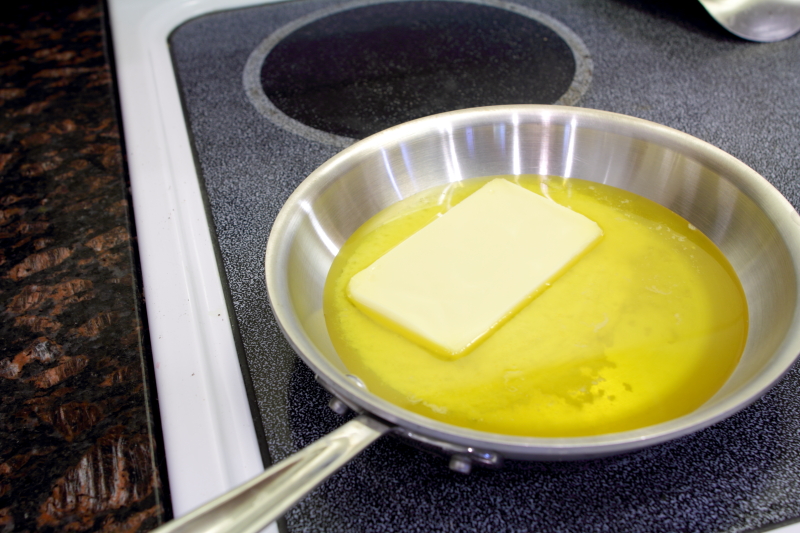
First, start by putting butter in a small sauté pan with your heat on medium low. Because butter can burn easily, it is important that your heat isn’t too high. Patience is a virtue in ghee-making, it’s better to cook it at a very low temperature over a longer period of time than end up ruining a batch because the pan got too hot (grass-fed butter isn’t cheap, you know?).
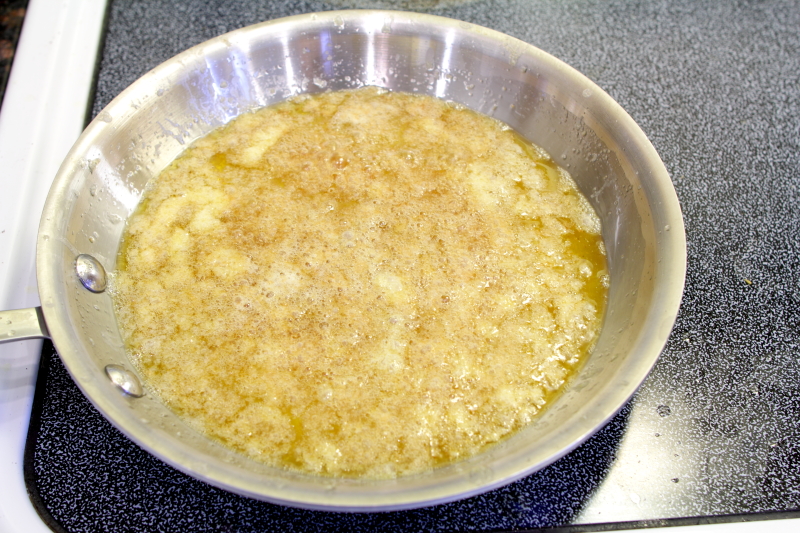
Once the butter has melted and begins to heat up, the fat and solids will start to separate. You will see the milk solids begin to fall to the bottom, the butterfat will rise to the top, and you will notice some bubbling. This is a GOOD thing.
At this point you may need to adjust your heat so you get very gentle bubbling. If your heat is too low, you won’t get any bubbling, or it will take you a very long time to get to this point in the process, but if your heat is too high, the milk proteins will burn and that is just downright disappointing (like I said, your patience will pay off).
Now it’s just a waiting game. The amount of time it takes for the ghee to finish depends on the surface area of the pan, humidity level, temperature of your stovetop, etc—it’s not an exact science =) And although you don’t have to hover over the sauté pan for the next hour plus, I would recommend checking on it every once in a while and giving the pan an easy shake.
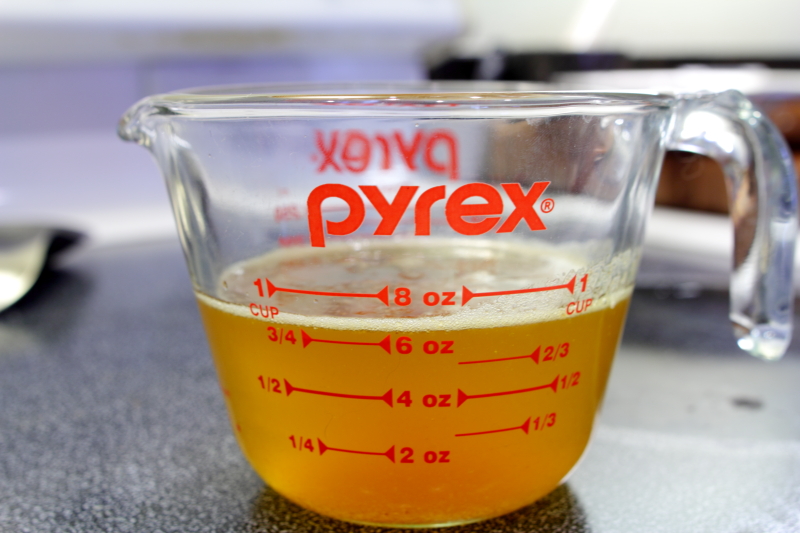
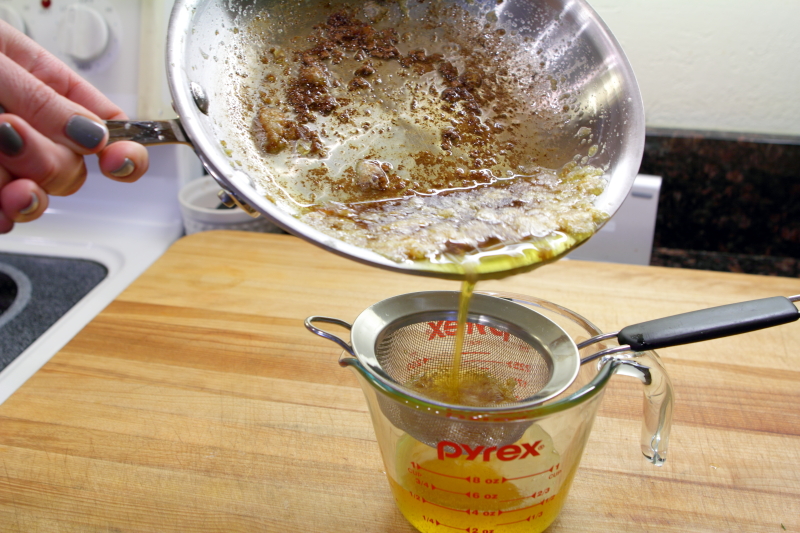
Once the ghee takes on a light to medium brown color, the bubbling has significantly slowed or stopped completely, and it has a faint nutty smell, it is finished. The final step in my how to make ghee process is to strain the butterfat to catch the milk solids that are now browned on the bottom of the pan. I like to strain twice, once from the pan into a glass measuring cup, and then again from the measuring cup into a small mason jar for storage. And now you know how to make ghee!
How to Make Ghee
Cook time: 60-120 minutes
Servings:
About 3/4 cup
Ingredients:
8 ounces grass fed butter
Instructions:
Place a small sauté pan over medium low heat.
Put the butter in the pan and let it melt slowly. As the butter melts, you will see the milk solids begin to collect on the bottom of the pan. As the butter heats up, it will begin to bubble. Adjust your heat so you get a very gentle bubbling; the key is to let the milk solids brown slowly, which provides the characteristic nutty flavor of the ghee. You will also notice the ghee start to foam on the top.
Once the milk solids are browned, the ghee will stop bubbling. Depending on how high your heat is, this process can take as little as 60 minutes and as long as 2 hours.
At this point, remove the pan from the heat and strain the ghee into a small jar.
Your ghee can be kept on the counter at room temperature or in the refrigerator.

Products linked from our website are items we use in our house every. single. day. We recommend them because they provide value and contribute to our Paleo Charmed Life. If you click through our links and make a purchase, we earn a little cash, which helps us keep bringing new information to you online.

Hi, I'm Tasha! I'm a sports medicine professional, wife, and pet parent, with a passion for food, fashion, sports, and living life to the fullest. Come along with my husband and I on the journey of our Paleo Charmed Life.

Recent Charms
-
How to Cook Spaghetti Squash | The Paleo Charmed Life
 Learn how to cook spaghetti squash for an easy, delicious side dish or low-carb pasta replacement.
 -
How To Spatchcock Chicken | The Paleo Charmed Life
 Learn how to spatchcock chicken. This is an easy method for roasting a whole bird and ensuring crispy skin and juicy, tender meat in about half as much time.
 -
Beef Stroganoff Recipe | The Paleo Charmed Life
 This beef stroganoff recipe combines whole food ingredients to create a class, comfort food taste!
New! Comments
Let us know what you think!